

How To Remove Windows Is Not Genuine In Windows 7
With the KB971033 update to the Windows vii Operating System, Microsoft made the then-latest version of the Windows OS capable of determining whether or non a copy of Windows 7 was genuine and the real deal. If, in any case, Windows 7 would determine that a specific copy of the Bone was not genuine, it would supplant the user's desktop wallpaper with a blank black background with a message stating "This re-create of Windows is non genuine" along with the version and build of the Windows Os installed on the computer in question.
This is quite similar to the "You lot may take been a victim of software counterfeiting" message that would announced on computers running on Windows XP should their copies of the OS be detected as pirated copies. While this technology is merely designed to display the "This copy of Windows is not 18-carat" bulletin to users using pirated copies of Windows 7, it sometimes slips upward and displays the message to Windows 7 users who own completely legitimate copies of Windows 7. This is especially the case with Windows 7 users who own completely legitimate OEM versions of Windows vii – the versions that came pre-installed on their PCs/laptops from their manufacturers and it shows an activation error.
Thankfully for you, though, the "This copy of Windows is not genuine" message can definitely be removed and the black background that information technology came with getting rid of. If you're afflicted by this trouble, regardless of whether or non you are using a legitimate version of Windows vii, and are interested in knowing how to resolve this issue, hither's how you tin do so:
Stage 1: Uninstalling update KB971033
First and foremost, you are going to have to uninstall update KB971033 from your computer. Nonetheless, keep in heed – this is simply part of the solution to getting rid of the "This copy of Windows is not genuine" bulletin and volition not be able to fix the event on its ain. To uninstall update KB971033, you need to:
- Open the Start Menu.
- Search for "windows update".
- Click on the search effect titled Windows Update under the Programs
- Click on View installed updates in the left pane.
- Once all of your installed updates have been loaded and you lot can come across them in the correct pane, sift through them, locate update KB971033, correct-click on it and click on Uninstall in the contextual card.
- Go through the uninstallation process and then restart your computer. Motion onto Stage 2 once your computer boots up.
Stage two: Resetting the licensing status of your computer
Once you have uninstalled update KB971033, y'all demand to reset the licensing condition of your calculator so that you are no longer met with the "This copy of Windows is not genuine" message on your desktop. To practice so, you demand to:
- Open the Commencement Carte du jour.
- Search for "cmd".
- Right-click on the search result named cmd and click on Run as ambassador. This volition launch an elevated Command Prompt that has administrative privileges.
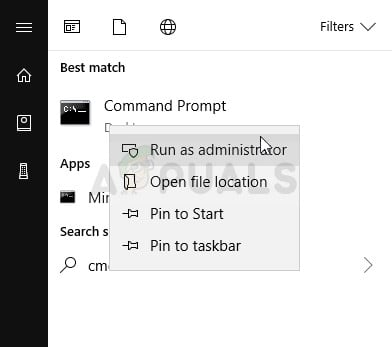
Running Command Prompt as an administrator - Type the post-obit command-line into the elevated Control Prompt and printing Enter:
slmgr -rearm
- You volition see a confirmation window. Click on OK.
- Restart your calculator, and once it boots upwards, you will run into that the "This copy of Windows is not genuine" message is no longer there. Your desktop will still have a blank black groundwork, but you are going to have to gear up that yourself by right-clicking on an empty space on your desktop, clicking on personalizing and irresolute your desktop background.
Note: The SLMGR –REARM control-line is designed to work on 32-bit versions of the Windows 7 OS and works on almost all 32-bit versions of Windows vii and a few 64-flake versions of Windows vii. However, if you use this command-line and run into that the "This copy of Windows is not genuine" bulletin is still there when yous restart your reckoner, you may have amend luck repeating the steps listed and described above but this time using the following command-line instead of SLMGR –REARM:
slmgr /rearm
If you run the "slmgr -rearm" or "slmgr /rearm" command-line and receive an error message stating that "This maximum allowed number of rearms has been exceeded", you need to go through the following steps in gild to set up the consequence and go along with Phase ii:
- Press Windows Logo primal + R to open a Run
- Type regedit. exe into the Run dialog and printing Enter.
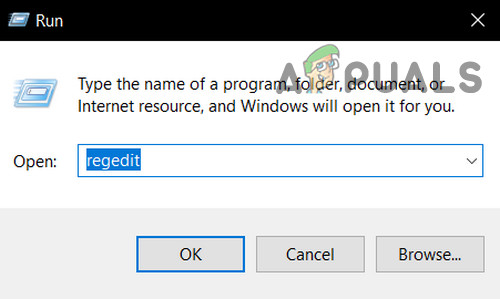
Open Regedit - In the left pane, navigate to the following directory:
HKEY_LOCAL_MACHINE > Software > Microsoft > WindowsNT > Electric current version
- In the left pane, click on the SoftwareProtectionPlatform binder to have its contents displayed in the right pane.
- In the correct pane, locate and right-click on a registry value named SkipRearm and click on Change in the contextual menu.
- In the Modify dialog box, change the Value information for the key from 0 to one and click on OK.
- Exit the Registry Editor and restart your computer. Give Phase ii another try when your calculator boots up, and you should be successful this time.
If you run the SLMGR –REARM or SLMGR /REARM command-line and receive an fault message stating that "SLGMR is not recognized as an internal or external command", the crusade tin exist i of iii things – you are typing the command-line incorrectly, you are not typing the command-line into an elevated Control Prompt that you are running as an administrator or there is a problem with your computer'southward slmgr.vbs file. If there is a problem with your estimator's slmgr.vbs file that is causing the control-line to not be executed correctly, here's what you need to do:
- Open My Computer.
- Double-click on the partitioning of your Hard disk that Windows vii is installed on.
- Double-click on the binder named Windows.
- Locate and double-click on a folder named System32.
- Locate and right-click on a file named slmgr regardless of what its extension is and click on Rename in the contextual menu.
- Rename the file to vbs.
- Restart your computer and requite Phase 2 another try when it boots up. This time, y'all should exist successful at running the SLMGR –REARM or SLMGR /REARM control-line.
Pro Tip: To make sure that the "This re-create of Windows is not genuine" bulletin does not come back, make sure that you turn off automated Windows updates. In order to turn off automatic Windows updates, you need to:
- Open the First Menu.
- Search for "windows update".
- Click on the search event titled Windows Update under the Programs
- Click on Change Settings in the left pane.
- Nether Important updates, open the dropdown bill of fare and click on Never bank check for updates (not recommended) from the listing of options.
- Restart your estimator.
As well, try to perform a startup repair if all else fails.
Phase three: Reconfiguring Plug and Play Service
In some cases, your computer'due south policy might not be configured properly due to which it might be preventing sure services from beingness started on your computer. Therefore, in this pace, nosotros volition be making some changes to the system's policies and brand sure that the Plug and Play Security service is set in such a way that it is allowed to startup automatically. For that:
- Press "Windows" + "R" on your keyboard to launch the Run prompt.
- Type in 'Rsop.msc" and press "Enter".
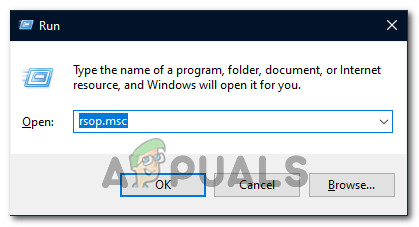
Typing in rsop.msc in the prompt - Setup should start afterwards you lot perform the above step, let the setup consummate and the Resultant Set of Policy window will open.
- Double click on the "Reckoner Configuration" option to expand information technology and then double click on the "Windows Settings" pick.
- Subsequently that, double click on the "Security Settings" and then double click on the "System Services" pick.
- In the right pane, there should be a comprehensive list of services that are supposed to be running in the background.
- Detect the "Plug and Play" service from the listing and double click on it to open its properties.
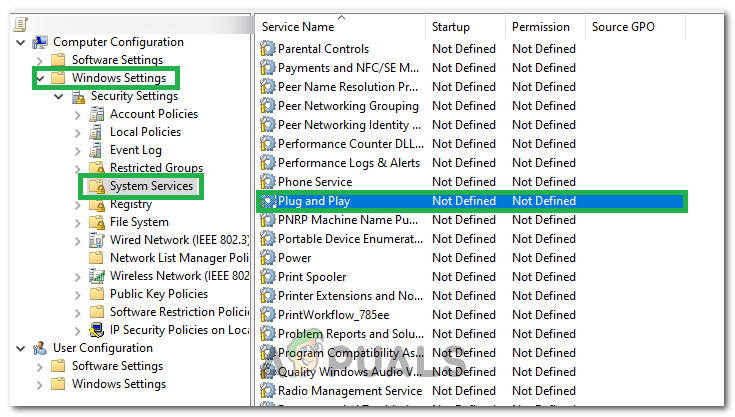
Double-clicking on the Plug and Play Service - In the "Select Service Startup Mode" selection, check the "Automatic" option, and make sure to save your changes.
- Now exit out of the window after making sure that your changes have been saved.
- Press "Windows" + "R" to launch the Run prompt once more and type in the following command.
gpupdate/force
- Press "Enter" to execute this control and wait for its execution to exist completed.
- Restart your calculator and check to see if the issue even so persists.
![]()
Source: https://appuals.com/removing-this-copy-of-windows-is-not-genuine/
Posted by: hopkinshodauld.blogspot.com
0 Response to "How To Remove Windows Is Not Genuine In Windows 7"
Post a Comment